While the pier columns are curing you can start to prepare for the arrival of your containers. The truck delivering your containers will need access to the site. A tilt off truck will need room to turn around so that he can back into position to drop his load. For a 40’ containers try to allow 150 feet of dry level ground for the driver to back into position, extend his bed, tilt it and slowly pull away as the container comes off.
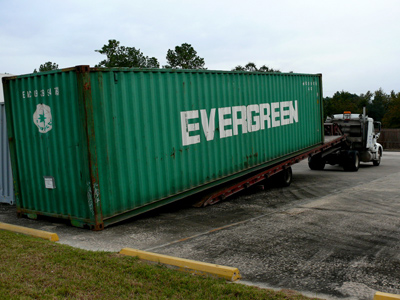
For a 20’ ISBU try to allow 100 feet of space. Inspect each unit in order to determine if any particular unit is better suited for any particular position in the overall scheme, for example trying to match planned cutouts to remove the most dented portions of the container. If you don’t have the option of a tilt-off service it will be necessary to arrange for a forklift or service crane for a 1/2 or full day to assist with the offloading from the truck. Depending on the site conditions a forklift with inflatable tires may be need if the terrain is rough or slippery. A service crane on the other hand will make short work of offloading and will easily be able to position your units for the
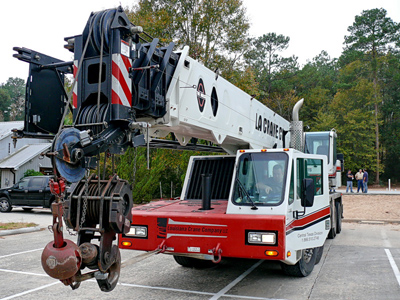
preliminary preparation. A crane and operator will typically rent for $150 tp $200 an hour, but the time saved makes it well worth it. When hoisting the containers into position an experienced operator and his crew will do all the rigging for the lift and maneuvering the load into proper position using ropes and teamwork to put the containers down exactly atop the piers. You just watch them work.

Once the containers are in place grind off any paint and residue on the corner castings where the units will be welding together. The connecting welds will joint the corner castings at both the top and bottom. It doesn’t seem that this is a lot of welding to hold the whole thing together, but the strength of the corner post will prevent any stress’ like twisting or other movements from reaching and weakening the weld.

Once your containers are firmly anchored to the piers and welded to one another you can begin to cut the openings for the doors and windows as well as the openings between containers.

Consult the plans for the locations of windows and doors as well as cutouts for rough plumbing and electrical. Develop a color code for these cutouts and, using the plans again, mark with paint or chalk, the rough locations of the doors, windows, and other wall cutouts. Use another color to denote the location of interior walls and two more colors to denote the electrical and plumbing cutouts. Use a plasma cutter to make the cuts rather than a torch which can overheat and distort the metal.
Scroll Down For Next Chapter